Jadex Active Components
With Jadex, you can use the Active Components approach to develop distributed applications. This approach combines a hierachical service component architecture (SCA) with the possibility of abstract business logic implementation based on BDI Agents or BPMN Workflows (see Component Types for more information).
The communication model is based on services. An Active Component is an entity that has defined dependencies with its environment. Similar to other component models these dependencies are described using required and provided services, i.e. services that a component needs to consume from other components for its functioning and services that it provides to others.
The interaction between components is fully network-transparent, so components can be executed on one or different machines without changing their code. The figure below summarizes the general concept of an Active Component.
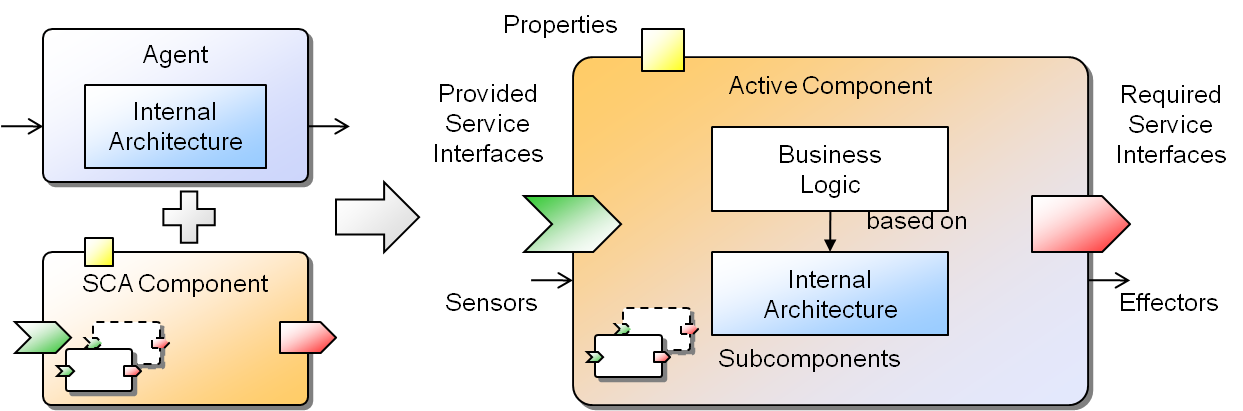
Active Component Structure
The following chapters introduce concepts with hands-on code examples and help you developing your own Jadex Active Components based applications.
If you do not want to setup your IDE now, skip the remainder of this chapter and continue to Platform.
IDE Setup
In this chapter, you will learn how to install eclipse for developing desktop applications with Jadex. Therefore, you will find instructions on setting up a proper eclipse working environment for programming and executing Jadex applications. If you use a different IDE the instructions and screenshots below should still be helpful for setting up your IDE accordingly. If you want to develop Android applications with Jadex, please refer to Android.
Note that this tutorial is not a replacement for the existing eclipse documentation. If you have questions about using eclipse try also looking for an answer at the http://www.eclipse.org/documentation/ site.
Prerequisites
- Download and install a recent Java environment from http://java.sun.com/javase/downloads (if not already present).
- Download and install a suitable Eclipse distribution (>= 4.4 Luna) from http://www.eclipse.org/downloads (if not already present). The following has been tested with the 'Eclipse IDE for Java EE Developers' package.
- If you want to use Gradle: Install the Gradle IDE Pack from eclipse marketplace.
Project Setup with Gradle/Maven
Jadex uses gradle as build tool. If you want to use Gradle or apache Maven for your project, you do not need to download the whole Jadex distribution. Just add a dependency for the required Jadex artifacts and they will be downloaded automatically. We provide an example project that uses maven/gradle which is described in the next section.
Alternatively, add the following code to your build script's dependency section (replace 3.0.117 with the desired version):
Gradle Project
compile 'org.activecomponents.jadex:jadex-distribution-standard:3.0.117'
A minimal complete build.gradle could look like this:
apply plugin: 'java'

repositories {
    jcenter()
    mavenCentral()
}

dependencies {
        compile 'org.activecomponents.jadex:jadex-distribution-standard:3.0.117'
}
If you want to use our nightly builds, you need add another repository:
repositories {
    maven
    {
        name 'jadexsnapshots'
        url 'https://nexus.actoron.com/content/repositories/oss-nightlies/'
    }
}
Apache Maven Project:
<repositories>
    <repository>
      <id>jcenter</id>
      <url>https://jcenter.bintray.com/</url>
    </repository>
</repositories>

<dependency>
    <groupId>org.activecomponents.jadex</groupId>
    <artifactId>jadex-distribution-minimal</artifactId>
    <version>3.0.117</version>
</dependency>
If you want to use our nightly builds, you need to add our repository:
<repositories>
    <repository>
        <id>jadex-oss-nightlies</id>
        <url>https://nexus.actoron.com/content/repositories/oss-nightlies</url>
    </repository>
</repositories>
Example Project
This section describes a way of setting up a Jadex project for development in eclipse using the Maven build tool. Since the provided example project also contains a build.gradle, it can also be used with gradle - though the following guide does only cope with maven setups.
Prerequisites
Download the jadex-example-project.zip from Downloads and unpack it to a place of your choice.
Importing the Jadex example project
- Use "File -> Import -> Maven / Existing Maven Projects" and choose "Next".
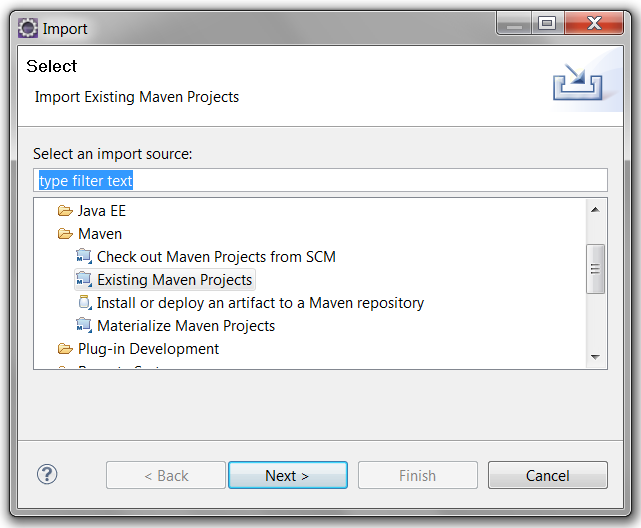
Import maven project (1)
- "Browse..." to the directory where you unzipped the jadex-example-project.zip. Maven will detect the project, which is described in the 'pom.xml' file.
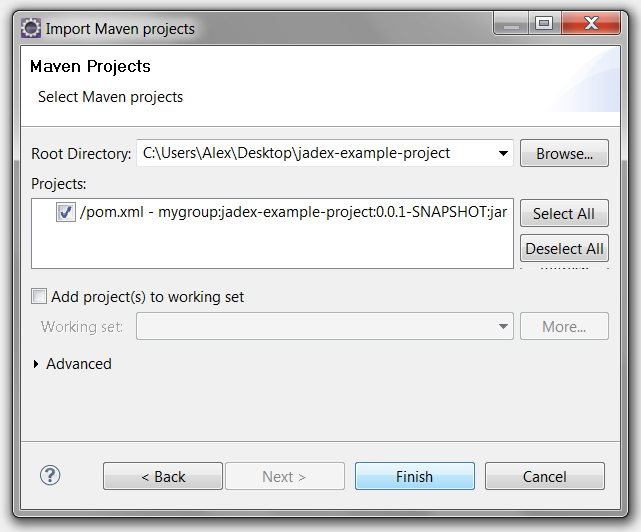
Import maven project (2)
- Click "Finish". Maven will import the project and start the build process thereby download the necessary Jadex libraries from the web.
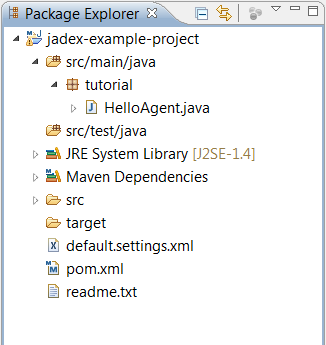
Imported example project in eclipse
Project Setup without Maven/Gradle
In this lesson you will set up an initial eclipse environment that can be used to develop applications using Jadex. Please follow the instructions carefully and compare your setup to the screenshots to verify that everything went fine.
Download the latest Jadex distribution from Downloads and unpack it to a place of your choice.
Start eclipse. Start the 'New Java Project' wizard, disable the 'Use default location' checkbox and browse to the directory, where you unpacked the Jadex distribution. Note that the name of the directory might slightly differ due to changing Jadex version numbers.
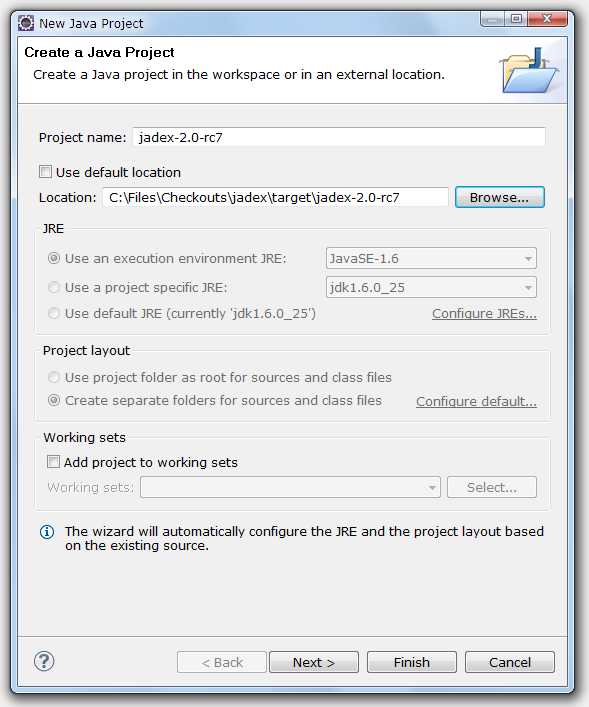
Create Java project in eclipse
Click 'Finish' - the project will be created. Your project should now look like the picture below.
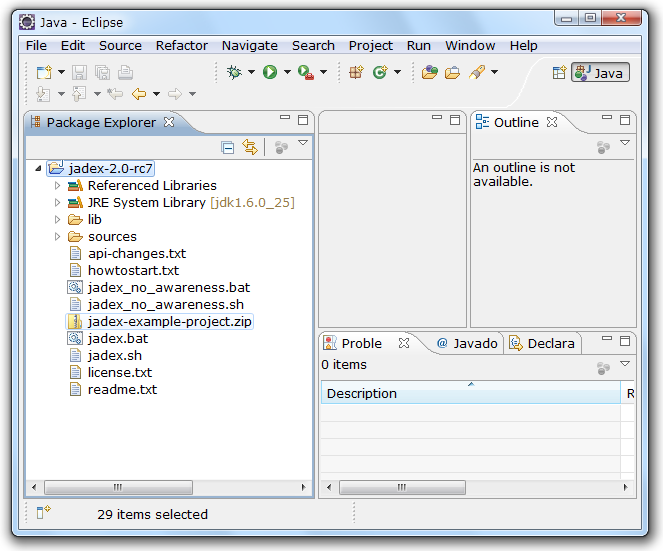
Final Jadex eclipse project layout
Note that depending on your eclipse configuration, the 'Referenced Libraries' node might by hidden and instead the jars from the lib folder will be displayed as direct child of the project. If you wish, you can change the appearence in the explorer menu by (de)selecting the "Show 'Referenced Libraries' Node" checkbox.

Show/hide the 'Referenced Libraries' node
This project will be used as a basis for your own development projects. To make the Jadex libraries accessible to other projects it is necessary in eclipse to export them. Right-click on the project, choose 'Build Path -> Configure Build Path...'. Go to the 'Order and Export' tab, choose 'Select All' and hit 'OK'.
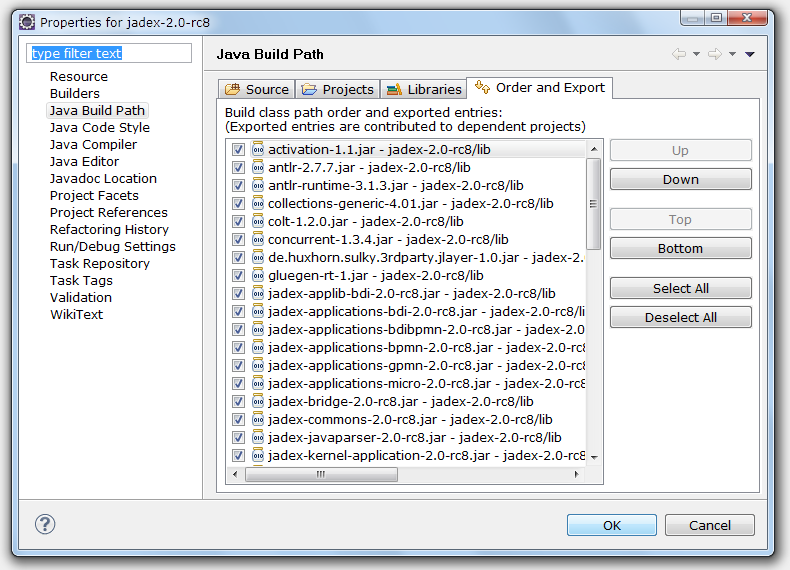
Export jars from build path
For further simplifying later development, you should attach the sources to the Jadex jars, as this will enable eclipse to provide better context sensitive help on method signatures, etc. Open the 'Referenced Libraries' node (if shown) and the 'jadex-applications-micro-3.0.117.jar'. In the 'jadex.micro.examples.helloworld' package double click on the 'HelloWorldAgent.class' file. The file will be opened, showing the reverse engineered byte code. Click the 'Attach Source...' button, choose 'Workspace...' and select the 'sources.zip' file contained in the Jadex project. Click 'OK'. The Java source of the hello world agent should now be displayed. Repeat these steps for the other Jadex jars. It is recommended for this tutorial to add the sources at least to the 'jadex-bridge', 'jadex-commons', 'jadex-kernel-micro' jars.
Using IntelliJ IDEA
Using IntelliJ IDEA for development with Jadex Active Components is not officially supported except for Android development. If you still want to use IntelliJ IDEA, just try to import the Jadex Example Project - gradle support is provided by IntelliJ.
If you want to compile the Jadex source code, import the project included in sources.zip. To start Jadex with the JCC, create a new Run Configuration using the following parameters:
- Main class:
jadex.base.Starter - Working directory: leave default
- Use classpath of module: jadex-platform-standalone-launch
- JRE: Set to a JDK with minimum version 1.7
Development Project Setup
In this lesson you will set up your own an eclipse project for all the files that you create in this tutorial.
Eclipse Project Setup
Create a new Java project in eclipse. Choose a name as you like (e.g. 'tutorial'). Create a Java package in this project. The following examples use 'tutorial' as a package name. You can find sample solution files in the Jadex distribution in the jadex.micro.tutorial package.
Add a reference to the project with the Jadex distribution. To do so, right-click on the tutorial project and select 'Build Path -> Configure Build Path...'. In the 'Projects' tab click 'Add...', check the 'jadex-3.0.117' checkbox and hit 'OK'. Close the build path window by hitting 'OK' again.
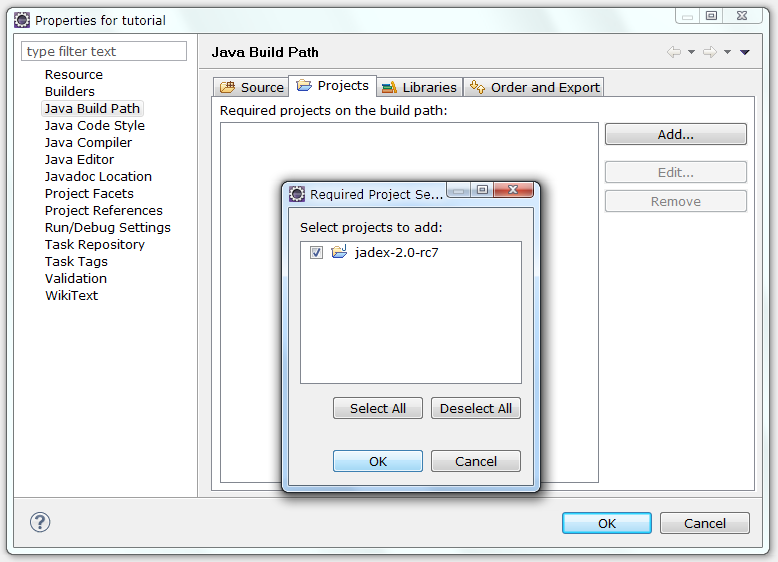
Add project dependency
Now change the launch configuration to start from the newly created project. Therefore, choose the 'Run -> Run Configurations...' menu. Right-click the 'Starter' configuration and choose 'Duplicate'. Change 'Starter (1)' to a more telling name of your choice (e.g. 'Start Jadex Tutorial Platform'). In the 'Main' tab select 'Browse...' besides the project textfield and choose your 'tutorial' project. Select 'Run' to save the launch configuration and start the platform.

Create Jadex launch configuration in eclipse
Jadex Setup
When starting the Jadex platform using your tutorial launch configuration, the JCC window will appear with the settings belonging to the tutorial project (i.e. nothing yet). Right-click in the model explorer and choose 'Add Path'. Browse to your eclipse workspace and select the 'bin' folder from the eclipse project that you created in the beginning of this lesson. When you unfold the contents, you should find the package(s) that you created. Save the settings. When you refresh the project content in eclipse, you should see the settings files appearing in the package explorer. The following screenshot shows how your setup should look like in eclipse (left) and in the JCC (right).

Layout of Jadex tutorial project
You are now ready to implement and execute your own components in Jadex.
Starting your applications
To start your applications developed with Jadex Active Components, you first need to start a Jadex Platform and then start your Component(s). Alternatively, you can pass your component to the PlatformConfiguration object:
    PlatformConfiguration   config  = PlatformConfiguration.getDefaultNoGui();
    config.addComponent("com.example.mypackage.MyAgent.class");
    Starter.createPlatform(config).get();